.png)

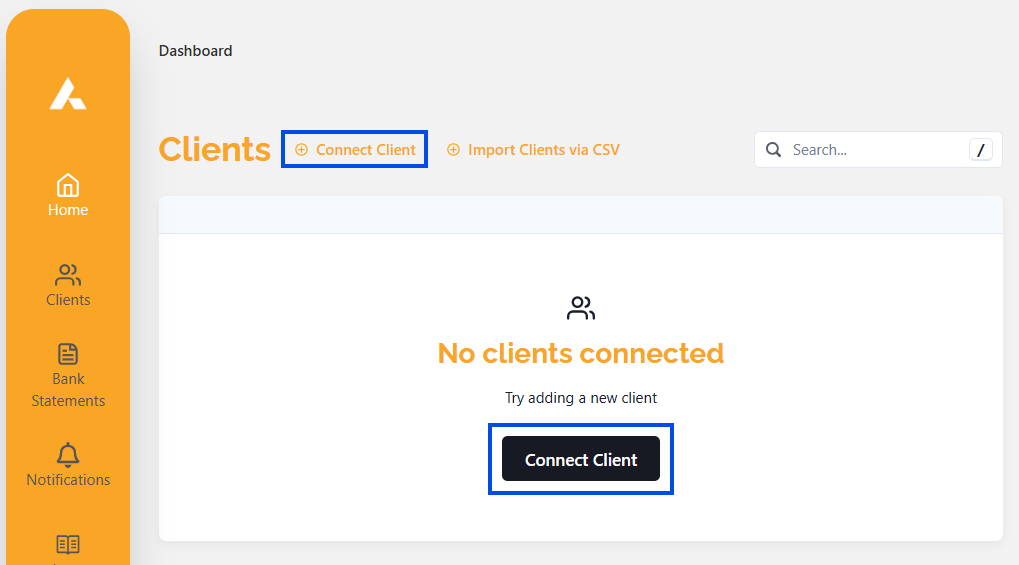
To start, go to your ACSISS Adviser dashboard and click Connect Client.
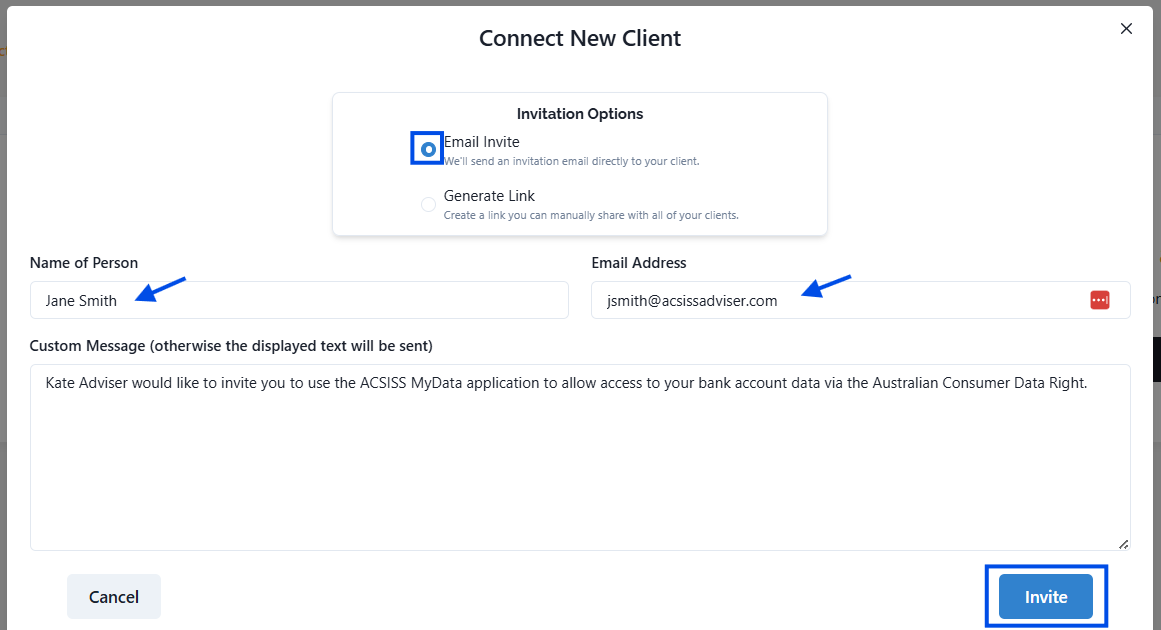
You can invite your clients directly from Adviser or if prefer, you can generate a link to copy and paste in the body of an email from your own email address.
Email from Adviser
Select Email Invite, then enter your client's name and email address in the provided fields. If desired, you can also personalise a message for them. Your customer will receive an email invitation to securely share their data through ACSISS My Data.
Generate a Link
Select Generate Link, then click Copy. Paste the invite link into an email and send to your client with a personalised message.

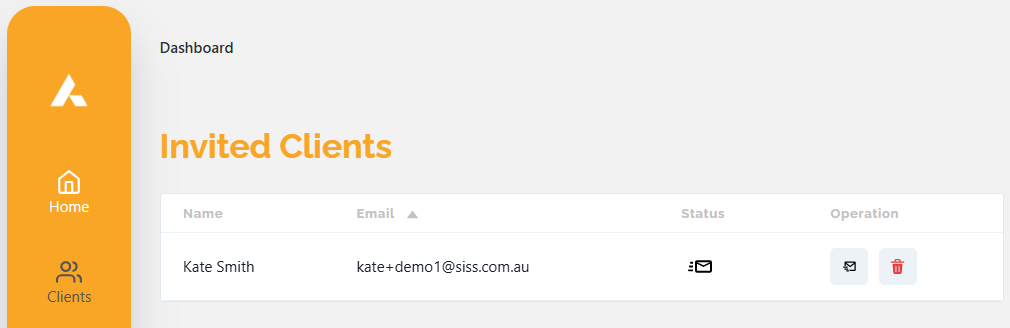
After sending the invitation, a new section will appear on your dashboard, displaying all the customers you have invited. This section provides an overview of your Invited Customers for easy management and tracking.
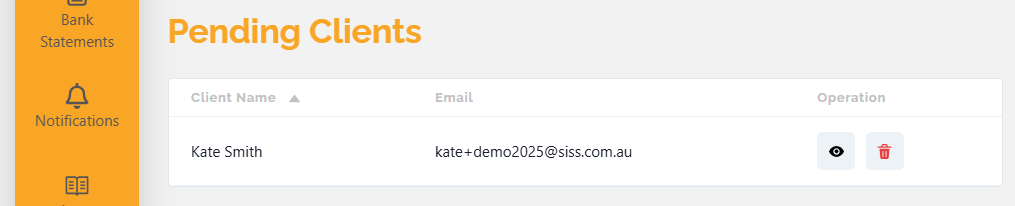
Once the customer accepts the invitation and successfully connects their bank account to their ACSISS My Data account, they will be moved to a dedicated section on your dashboard called Pending Customers.
This section allows you to track and manage the customers who have initiated the connection process but are still pending completion.
Next, you will need to accept or decline the accounts that your customer has granted you access to. To do this, click on the eye icon next to the customer's name and navigate to the New Accounts section.
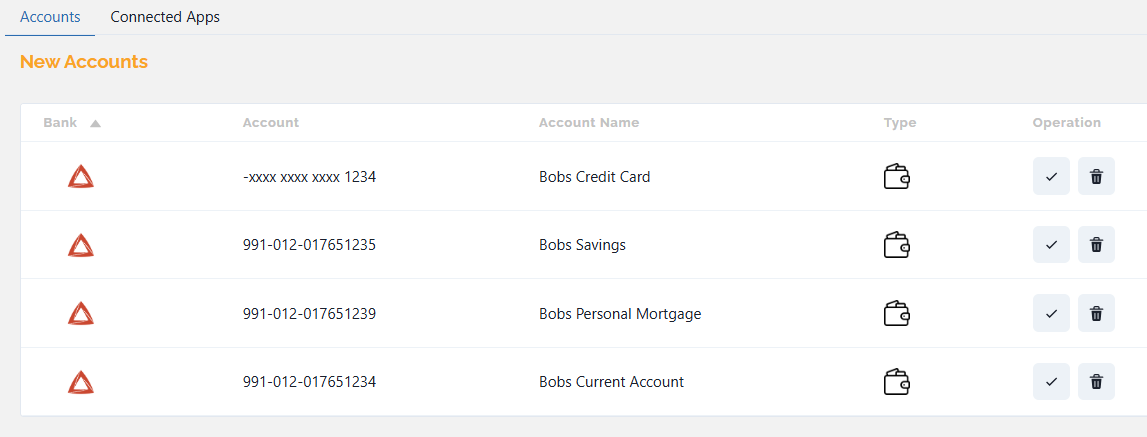
From there, you can review the bank account details and make a decision by accepting or declining the requested access.
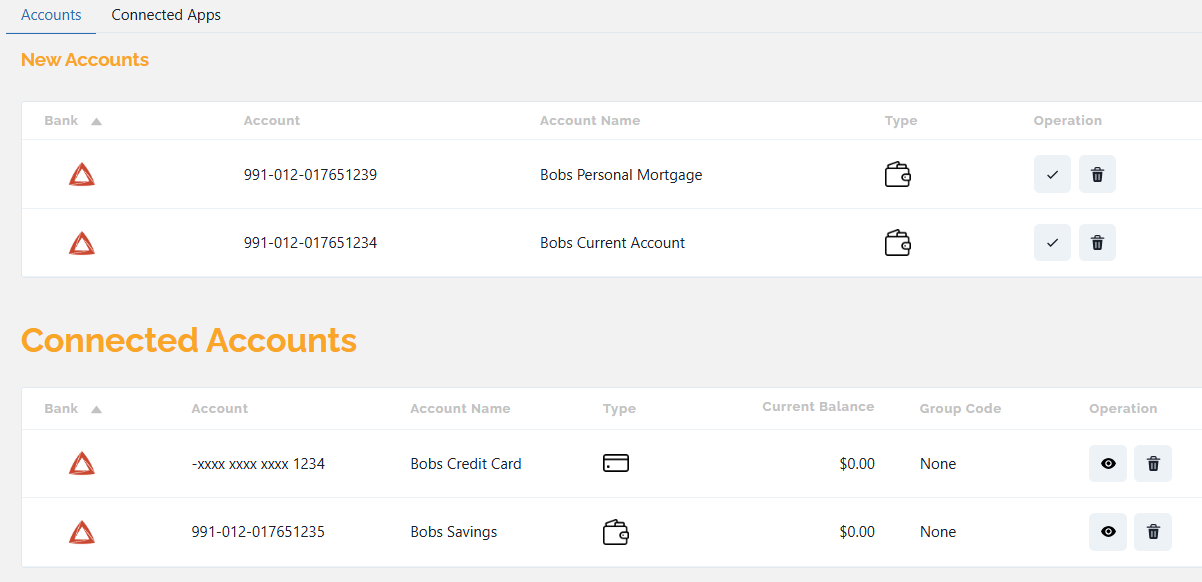
In the Operation column, click the check button corresponding to the account you wish to access securely.
This action will move the account to the Connected Accounts section, indicating that you now have authorised access to it. If you do not need to access a particular account that your customer shared, you can click the trash button instead to remove it.
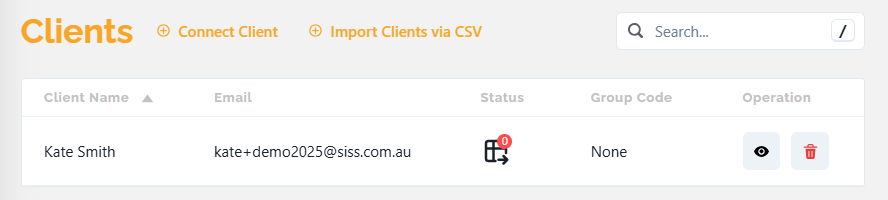
The client will receive a notification via email and on their My Data dashboard. The client will also be moved to the Clients section on your dashboard, indicating that they are now part of your client list.
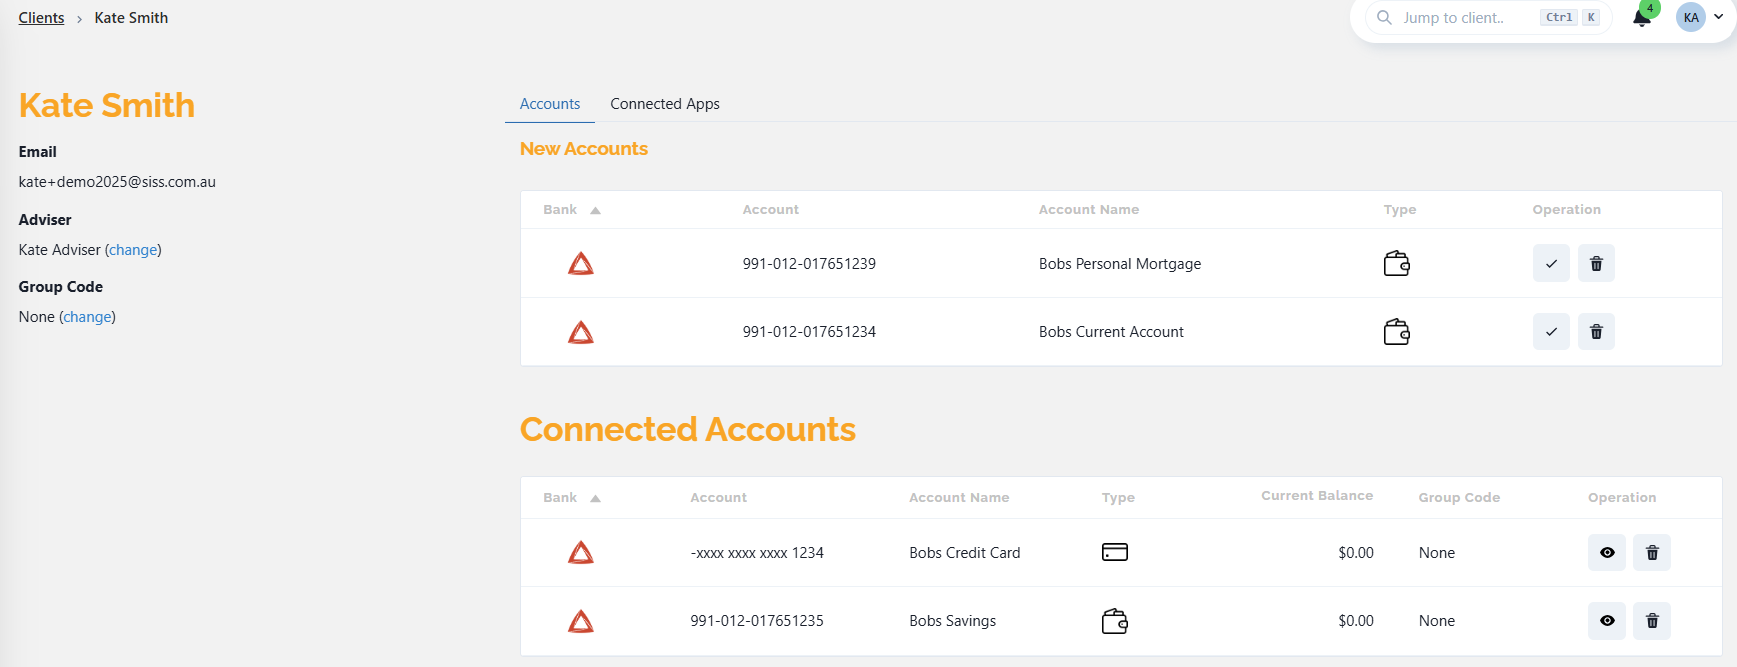
To view all the shared accounts and their corresponding transactions and data for a specific customer, simply click on the eye icon located beside the customer's name. This action will allow you to access a comprehensive view of the customer's shared accounts and the associated transaction details.
You have successfully connected a customer with accounts. Transaction data will update overnight.